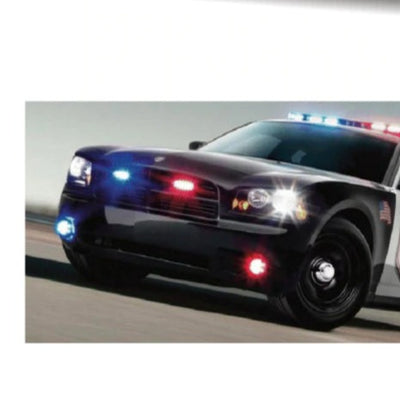


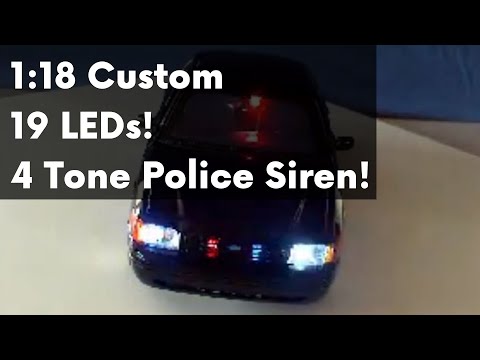
Get the lights to make a car like this
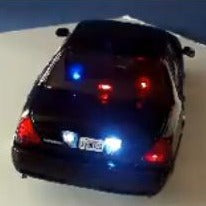
We used all fast flashing to modify this car. The LED colors show off much better in person; our camera can't capture the colors of such bright LEDs!
Need different colors? Not a problem!
Contact us or mention your changes in the comments box at checkout!
*Car NOT included* This model is a SAMPLE of what you could do with these lights.
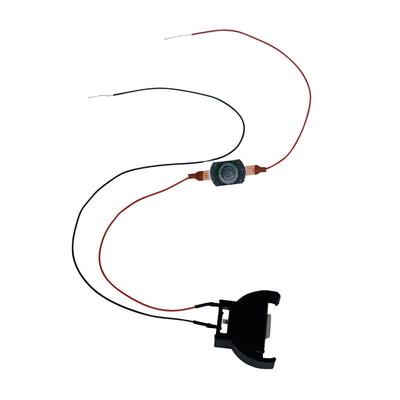
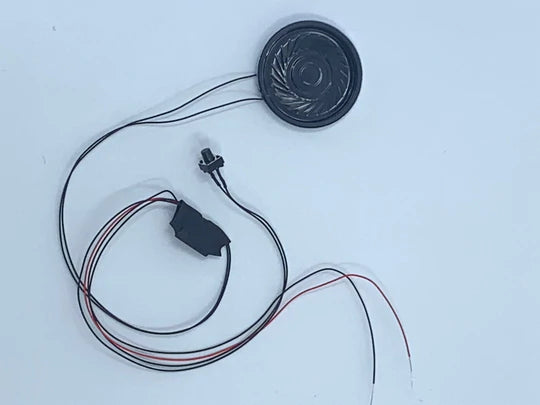
In this kit: our 4-tone siren with pre-attached battery snap with switch!
|
Location |
Quantity |
Color / Size |
Flash/Solid |
Wire Length |
|---|---|---|---|---|
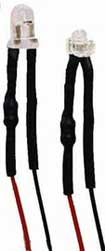
| Headlight | 4 | 3mm Cool White | Fast Flash | 14" |
| Front Grill | 2 | 3mm Red-Blue | Fast Flash | 14" |
| Rearview Mirror | 1 | 1.8mm Red | Fast Flash | 14" |
| Rearview Mirror | 1 | 1.8mm Blue | Fast Flash | 14" |
| Tail Light | 4 | 3mm Red | Fast Flash | 8" |
| Brake Light | 1 | 3mm Red | Solid | 8" |
| Back Ledge | 2 | 3mm Yellow | Fast Flash | 8" |
| Back Ledge | 2 | 3mm Red-Blue | Fast Flash | 8" |
| License Plate | 2 | 3mm Cool White | Fast Flash | 8" |
A total of 19 LEDs plus a siren and battery snap w/ switch.
All will run on a single 9-volt battery.
The 9-volt battery fits into the trunk of 1:18 Motormax Crown Victoria cars.
We pre-attach a siren to our battery strap for easy installation.
This whole kit
-- 19 LEDs, Siren, --Strap with switch
is yours for a special price!
Installation isn't too difficult, but it will be a time-consuming project.
- Unscrew the screws on the underside of the car and pull the chasse out of the body.
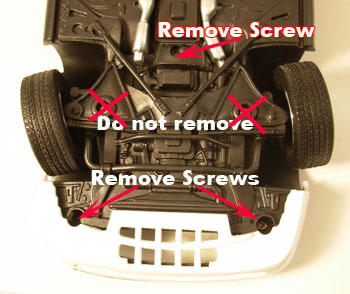
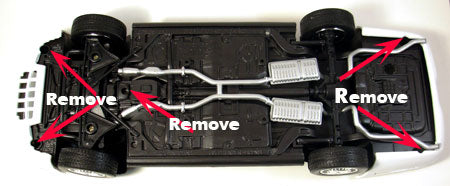
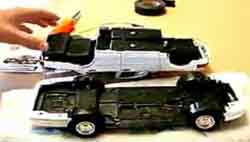
Now you have your hollow police car ready to work on.
- Remove the lenses from the inside. You can use a soldering iron and heat up the plastic stub that holds the lens in place and then gently slip it out of the hole.
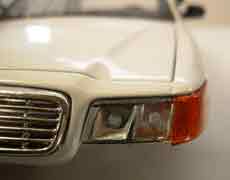
- Next, enlarge the holes for the headlights and tail lights. We like to use a cordless drill to drill holes and get a good-quality cobalt drill bit to get through diecast metal.
- Our lights come wired with resistors. Note: They are not pre-connected to the battery strap. We find it easier to install them when they are not part of a net of lights.
- When you get your lights glued in place with silicone or glue, use small strips of duct tape inside the body of the car to keep the lights solidly in place.
- Now bring all of the black wires back to the black wire on the battery strap and hook them up. For extra security, use solder.
- Complete the same process with all of the red wires and the red wire on the battery strap.
- We also use small strips of duct tape to tape the wires out of the way during reassembly and also to make sure the wires cannot be seen.
- The siren is pre-connected to the battery strap and has its own momentary tap switch.
- The lights also have a separate switch.
- Drill holes for the momentary and on/off switch under the bumper of the car.
- Connect your fresh 9-volt battery to the battery snap and put it in the trunk. You may need to remove the spare tire to fit the battery depending on the car.

What else do I need?
- A diecast police car, of course! Get started with a 1:18th scale car from online sources
- Small Phillips screwdriver to unscrew the bottom of the car.
- Variable-speed cordless drill with a cobalt drill bit for drilling into the diecast
- A 7/64th drill bit when we want just the tip of the LED to poke out the hole, like behind the headlight and tail light lens. When we want the whole LED to show like on the back ledge, we use a 1/8th drill bit.
- Glue for the lights. Some use Model Airplane canopy glue, which is used for windshields and windows on models so it dries perfectly clear. Silicone or superglue can also be used.
- Epoxy to hold the 2 switches in place where they poke out underneath the car.
- Duct tape to hold wires out of the way.
- Connect the LED wires to the Battery Strap by:
- Twisting and Shrink Tubing
- OR, use Solder and Shrink Tube
- Fresh 9-volt battery to put in the trunk.
Check out our siren install video here: Siren Install Video to see how the siren is normally installed.